


Mounting a rooftop tent is one of the most common upgrades for vehicle-based overlanding and camping. Understanding rooftop tent weight limits before installing one is essential, and there is an important question every overlander and camper should ask.
Can my vehicle actually support a rooftop tent?
If you’ve asked yourself that question, you’re in the right place. Knowing how rooftop tent weight limits work and the difference between static and dynamic roof load ratings is essential for a safe and confident setup. The good news is that most modern vehicles can support a rooftop tent when it is properly installed. The key is understanding what those numbers really mean.
If you’re still exploring different vehicle-based camping setups, our vehicle camping guide explains how rooftop tents compare to other options and what to consider before upgrading your vehicle.
Let’s break it down.
What is Rooftop Tent Weight Limit?
A rooftop tent weight limit refers to how much weight your vehicle’s roof is designed to support.
Manufacturers publish this number as a roof load rating, typically listed in your vehicle owner’s manual.
However, there’s an important detail many people miss:
Most vehicles list a dynamic load rating, not a static one.
That distinction matters more than anything else when installing a rooftop tent.
Static vs Dynamic Roof Load: What’s the Difference?
When people search for “rooftop tent weight limit” they’re usually mixing up two very different and very important measurements. Let’s get into it.
What Is Dynamic Roof Load?
Dynamic load refers to how much weight your roof can safely carry while the vehicle is moving.
This includes:
- The weight of the tent
- The weight of the roof rack system
- The added force created by acceleration, braking, and cornering
- Wind resistance at highway speeds
Dynamic roof load ratings are typically lower because they account for these additional stresses. Always confirm your vehicle’s published roof load rating in your owner’s manual and follow manufacturer safety recommendations outlined by the National Highway Traffic Safety Administration (NHTSA) before installing any roof-mounted system.
What Is Static Roof Load?
Static load refers to how much weight the roof can support when the vehicle is parked.
When you’re camped:
- The vehicle is not moving
- There are no wind forces from driving
- Weight is distributed across rack mounting points
Static capacity is almost always significantly higher than the dynamic rating.
This is why rooftop tents are possible in the first place.
When you’re sleeping in a rooftop tent, the roof is supporting static weight not driving forces.
How Much Weight Can a Car Roof Hold?
Most passenger vehicles have dynamic roof load ratings between 100–165 lbs, though this varies by model.
That might sound low at first. But remember:
- Many rooftop tents weigh within that range
- Rack systems add additional weight capacity
- The dynamic rating is what matters while driving
When parked, the static load capacity often allows the roof structure to safely support the tent and occupants provided everything is installed correctly.
The only way to know for sure is to check your specific vehicle’s manufacturer specifications.
Do Rooftop Tents Exceed Roof Weight Limits?
In most cases, no. Roof tents do not exceed roof weight limits when the tent installed properly.
Here’s what makes the difference:
- A quality roof rack or crossbar system
- Even weight distribution
- Staying within the vehicle’s published dynamic rating
- Using mounting hardware designed for rooftop tents
It’s not just about the tent weight alone. You must account for:
- Rack system weight
- Mounting brackets
- Additional accessories
A well-designed system works within those limits.
It’s also worth noting that soft shell rooftop tents are often lighter than hard shell models, which can make them a practical option for vehicles with lower dynamic roof load ratings. If you’re comparing designs, our soft shell vs hard shell rooftop tent guide breaks down the key differences in weight, setup, and structure.


Can a Small Car Support a Rooftop Tent?
This is one of the most common concerns.
Sedans, hatchbacks, and wagons can often support rooftop tents, but not all vehicles are equal.
Things to evaluate:
- Factory roof rails vs bare roof
- Approved crossbar weight capacity
- Structural roof design
- Vehicle payload rating
Smaller vehicles typically require more attention to rack selection and installation quality. Crossovers and wagons often make excellent rooftop tent platforms because they combine manageable size with stronger roof structures.
The key isn’t vehicle size alone it’s the engineering behind the roof system.
What Happens If You Exceed Roof Load Limits?
Exceeding published roof load limits can lead to:
- Compromised handling while driving
- Increased braking distance
- Structural stress on mounting points
- Potential warranty concerns
This is why understanding dynamic load rating is critical.
Rooftop tents are safe when installed within manufacturer specifications but ignoring those limits isn’t worth the risk.
How to Safely Install a Rooftop Tent
A safe rooftop tent setup starts with preparation.
1. Confirm your vehicle’s dynamic roof load rating.
2. Choose a rack system rated to support the tent weight.
3. Ensure mounting hardware is properly torqued.
4. Distribute weight evenly across crossbars or platform racks.
5. Re-check hardware after initial installation and first drive.
Taking the time to install correctly protects both your vehicle, your investment, and the safety of others on the road.
If you’re exploring different tent options, you can browse our rooftop tent collection to compare weights and specifications before selecting a model that fits your vehicle’s limits.


Common Rooftop Tent Weight Myths
There are a few misconceptions that come up repeatedly.
Myth: My roof can’t support two adults.
Reality: Static load capacity when parked is typically much higher than dynamic load rating.
Myth: All vehicles have the same roof limits.
Reality: Ratings vary widely by manufacturer and model.
Myth: Rooftop tents are too heavy for passenger cars.
Reality: Many modern vehicles can safely support them with the right rack system.
Understanding the difference between moving and parked load ratings clears up most of the confusion.
Rooftop Tent Weight Limit FAQs
How much weight can a rooftop tent hold?
Rooftop tents are designed to support occupants when properly mounted to a compatible rack system. In most cases, the limiting factor is your vehicle’s dynamic roof load rating (while driving) and the combined weight of your tent + rack system.
What is a static roof load rating?
A static roof load rating is how much weight a vehicle’s roof can support while parked. This is the rating that applies when people are sleeping in a rooftop tent, and it’s typically much higher than the dynamic rating.
What is a dynamic roof load rating?
A dynamic roof load rating is how much weight the roof can safely support while the vehicle is moving. It accounts for driving forces like wind resistance, braking, cornering, and road impact—so it’s usually the more limiting number for rooftop tent setups.
Will a rooftop tent damage my car roof?
When installed with a compatible rack system and kept within your vehicle’s published load limits, rooftop tents should not damage your roof. Issues typically come from improper installation, uneven load distribution, or exceeding the vehicle’s dynamic roof rating.
Do rooftop tents affect gas mileage?
Yes. Any roof-mounted setup increases aerodynamic drag, which can reduce fuel efficiency—especially at highway speeds. Removing the tent when it’s not in use can help improve mileage.
Can you put a rooftop tent on a sedan?
Some sedans can support a rooftop tent, but it depends on the roof structure and manufacturer load rating. Always confirm your vehicle’s dynamic roof load rating and use a rack system rated for rooftop tent use before installing.
Roof Tent Weight Limits Final Thoughts
Your roof does not determine whether you can camp. How you prepare and what you use does.
Rooftop tent weight limits are not barriers. They are part of building a setup you can trust. When you understand static and dynamic load ratings, you are not just checking a box. You are making sure your vehicle is ready for long drives, rough roads, and quiet nights under the stars.
The goal is not just mounting a tent. It is creating a setup that lets you travel farther, park with confidence, and wake up wherever the road takes you.
With the right knowledge and the right gear, your vehicle becomes more than transportation. It becomes your basecamp and your gateway to adventure.
Happy Camping!
Enjoyed This Post?
Discover more tips, gear guides, product reviews, and overlanding insights from the 23ZERO team.
Explore the Blog →This vehicle camping guide explores why camping with your vehicle has become one of the most popular ways to get outdoors, and for good reason. Whether you drive a crossover, SUV, pickup truck, purpose-built overland rig, or you tow an overland trailer, vehicle-based camping offers flexibility, comfort, and the freedom to camp farther off the beaten path.
This guide breaks down what vehicle camping actually is, the types of vehicles that work best, and how to choose the right setup based on how you travel, not just what you drive. Let’s get into it.
What is Vehicle Camping?
Vehicle camping is any style of camping where your vehicle plays a central role in your shelter or sleep system.
That can mean:
- Sleeping inside your vehicle
- Sleeping on top of your vehicle with a rooftop tent
- Sleeping behind or beside your vehicle using a trailer or ground-based setup
Unlike traditional tent camping, vehicle camping prioritizes:
- Faster setup and breakdown
- Elevated or weather-protected sleeping areas
- The ability to move camp easily without packing everything up
For many people, vehicle camping is the bridge between casual weekend road trips and more advanced overlanding travel.


Common Types of Vehicle Camping Setups
There’s no single “right” way to camp with a vehicle. Most setups fall into one of these categories, all of which are covered in this vehicle camping guide.
Sleeping Inside the Vehicle
Some travelers choose to sleep inside their car, SUV or wagon by folding seats down and using a sleeping platform or air mattress. Ever heard of car camping? This is it.
Best for:
- Minimalist travelers
- Short trips
- Mild weather conditions
Limitations:
- Limited space
- Condensation and airflow challenges
- Requires clearing out gear each night
Rooftop Tent Camping
Rooftop tents mount to a roof rack or bed rack and provide an elevated, dedicated sleeping space above the vehicle.
Why people choose rooftop tents:
- Fast setup compared to ground tents
- Sleeping off the ground
- Better airflow and weather protection
- Keeps bedding stored inside the tent
This style is popular with SUV owners, truck owners, and overland travelers who want consistency and comfort.
Truck Bed Camping
Pickup trucks offer multiple camping options:
- Sleeping directly in the bed
- Truck bed tents
- Cot and swag setup
- Rooftop tents mounted over the cab or bed
This approach works well for travelers who want to keep their sleeping area separate from cargo and daily driving space.
Trailer-Based Camping
Some campers mount rooftop tents to small trailers instead of directly to their vehicle.
Benefits include:
- No roof load on the vehicle
- Ability to detach camp and explore unloaded
- More space for gear
This setup works well for longer trips or multi-person camps.
Types of Vehicles Commonly Used for Camping Guide
Your vehicle plays a major role in what kind of camping setup makes sense. In this vehicle camping guide we cover just that, let’s get into it. Here’s how different vehicle categories typically fit into vehicle-based travel.
Cars, SUVs and Crossovers
Vehicles like cars, crossovers and SUVs are some of the most common platforms for vehicle camping.
Why they work well:
- Enclosed cargo area
- Factory roof rails on many models
- Comfortable daily driving and long-distance travel
Things to consider:
- Roof load ratings
- Roof shape and crossbar spacing
- Payload capacity once passengers and gear are added
Many SUV owners choose rooftop tents to preserve interior space while keeping camp setup simple.
Pickup Trucks
Pickup trucks are incredibly versatile for camping, especially for longer trips.
Advantages:
- Dedicated cargo bed
- Can carry heavier gear more easily
- Compatible with bed racks, bed tents, and rooftop tents
Key considerations:
- Short bed vs long bed
- Bed rack height
- Tailgate access and clearance
Truck owners often build modular setups that allow them to adapt between daily use and camping mode.
Off-Road and Overland Vehicles
Purpose-built off-road vehicles are designed for rough terrain and extended travel.
Strengths:
- High ground clearance
- Durable suspension
- Strong accessory support
These vehicles often pair well with rooftop tents, awnings, and modular storage systems for multi-day trips.
Trailers and Towable Overland Platforms
Camping or overland trailers are gaining in popularity and can expand your setup without modifying your vehicle or compromising interior or exterior cargo space.
Best for:
- Families or group travel
- Longer basecamp-style trips
- Vehicles with limited roof capacity
Trailers allow you to keep camp established while using your vehicle for day trips.


How to Choose the Right Vehicle Camping Setup
Instead of asking “What tent should I buy?”, start by asking yourself these questions in this vehicle camping guide:
How many people need to sleep?
→ Solo travelers, couples, and families all have different space requirements.
How often will you move camp?
→ Frequent moves favor fast-deploy systems like rooftop tents.
What type of terrain will you travel?
→ Off-road travel may limit trailer use and influence weight distribution.
How much gear do you carry?
→ Roof-mounted sleeping frees up interior cargo space or exterior truck bed space.
Do you use your vehicle daily?
→ Many people need a setup that transitions easily between daily driving and camping trips.
Your vehicle camping setup should support how you actually travel — not force you to work around it.
Common Vehicle Camping Mistakes to Avoid
Even experienced campers can run into issues. A few common pitfalls:
- Ignoring roof load ratings
- Overpacking without accounting for payload limits
- Choosing a setup that’s too complex for short trips
- Blocking rear access or tailgate functionality
- Underestimating wind and weather exposure
A thoughtful setup improves safety, comfort, and overall enjoyment.
Is Vehicle Camping Right for You?
Vehicle camping isn’t about replacing traditional camping — it’s about expanding your options.
If you value:
- Quick setup
- Flexible travel routes
- Comfortable sleeping
- Keeping gear organized and accessible
Then vehicle-based camping may be a great fit for your adventures. If you’re unsure, refer back to the vehicle camping guide anytime to make sure your decision is the right one.
Vehicle Camping FAQs
What is the best vehicle for camping?
There is no single “best” vehicle. The ideal camping vehicle depends on how many people you travel with, where you go, and how much gear you carry. SUVs, trucks, and off-road vehicles can all work well with the right setup.
Can any car be used for vehicle camping?
Most vehicles can support some form of camping, but not all vehicles are suitable for rooftop tents. Roof load ratings, roof design, and payload capacity should always be checked before adding equipment.
Is rooftop tent camping safe?
When installed correctly and used within weight limits, rooftop tents are a safe and proven option for vehicle camping. Proper mounting and quality roof racks are critical.
Do I need a roof rack for vehicle camping?
Not always. Sleeping inside a vehicle or using a trailer may not require a roof rack. Rooftop tents, however, always require a compatible rack system.
Is vehicle camping good for beginners?
Yes. Vehicle camping can be very beginner-friendly because it reduces setup time, keeps gear organized, and allows you to camp comfortably without extensive backpacking experience.
How much does a vehicle camping setup cost?
Costs vary widely depending on the setup. Vehicle camping can be as simple as sleeping inside your car or as advanced as a fully equipped overland system. Many people build their setup over time.
Can you camp in cold or wet weather with a vehicle setup?
Yes. Vehicle camping systems, especially rooftop tents, often provide better weather protection than traditional ground tents when paired with proper insulation, ventilation, and cold-weather gear.
Vehicle Camping Guide: Final Thoughts
In this guide we’ve talked about how vehicle camping is less about what you drive and more about how you travel. With the right setup, nearly any vehicle can become a capable basecamp for adventure. It’s not the rig or the vehicle that defines how you camp, it’s how you define your setup and the way you choose to travel.
As you explore different camping styles, vehicle types, and destinations, your setup will naturally evolve and that’s part of the never ending journey. We’re no stranger to that at 23zero, and we’re here for you every step of the way!
Happy Camping!
Enjoyed This Post?
Discover more tips, gear guides, product reviews, and overlanding insights from the 23ZERO team.
Explore the Blog →Overlanding with kids or family overlanding is a very different experience than traveling solo or as a couple. The pace changes. The priorities shift. And the gear that once worked perfectly suddenly starts to feel limiting.
For families, comfort, space, and simplicity matter just as much as durability and performance. Bedtime routines replace late nights around the fire. Weather matters more when kids are involved. And sleeping arrangements need to work for everyone—not just the most adaptable adult in the group.
That’s where rooftop tents can shine for family overlanding—if you choose the right one. And more than any other factor, size plays a critical role.
What families actually need from a rooftop tent
When parents start researching rooftop tents, they often run into a disconnect. Many tents are “rated” for four people, but that doesn’t always translate into a comfortable night’s sleep—especially with kids.
In practice, families need more than just a headcount rating. A family-friendly rooftop tent should offer:
- Enough space for four to six people to sleep comfortably together
- Sufficient width so kids can sleep sideways without crowding
- Interior room to shift positions or sit up without waking everyone
- Quick, predictable setup after long drive days
- Strong ventilation and weather protection for changing conditions
- Easy, manageable access for kids and parents alike
When these needs aren’t met, families often end up splitting sleep setups or abandoning rooftop tents altogether. The right size roof tent removes those compromises.
Why size matters more for families than solo travelers
For solo travelers or couples, a compact rooftop tent can be ideal. Smaller footprints, faster deployment, and a low profile all make sense when space demands are minimal.
Families, however, experience space differently.
Width becomes more important than length. Real, usable sleeping area matters more than spec-sheet capacity. Kids move during the night, parents get up early, and everyone benefits from having room to breathe.
A tent that technically sleeps four adults may feel cramped once you account for sleeping bags, pillows, kids shifting positions, or simply wanting a bit of personal space. Larger platforms reduce nighttime disruptions and make mornings smoother—small details that add up quickly on multi-day trips.


Soft-shell vs hard-shell rooftop tents for families
Hard-shell rooftop tents are popular for their sleek design and fast deployment, and they work exceptionally well for couples and minimalists. Their fixed footprint, however, naturally limits sleeping area.
Soft-shell rooftop tents scale differently. Fold-out platforms create significantly more mattress space, making them better suited for multiple sleepers. For a deeper breakdown of the tradeoffs, see our guide comparing hard-shell vs soft-shell rooftop tents. That extra width, sleeping space, and flexibility can make all the difference for families.
Soft-shell designs also tend to be more forgiving during the day. They’re easier to access for naps, weather breaks, or downtime at camp—something families appreciate when plans don’t always follow a strict schedule.
Features that matter most when camping and overlanding with family
When camping as a family, small details matter more than you might expect.
Multiple access points or dual telescoping ladders reduce nighttime disruptions. Interior lighting makes bedtime routines easier. Ventilation and temperature control help keep everyone comfortable when conditions change. Storage solutions keep muddy shoes and wet gear out of sleeping areas.
None of these features are strictly necessary for a solo camper—but together, they significantly improve the experience for families sharing a tent.


An example of a family-friendly rooftop tent for overlanding
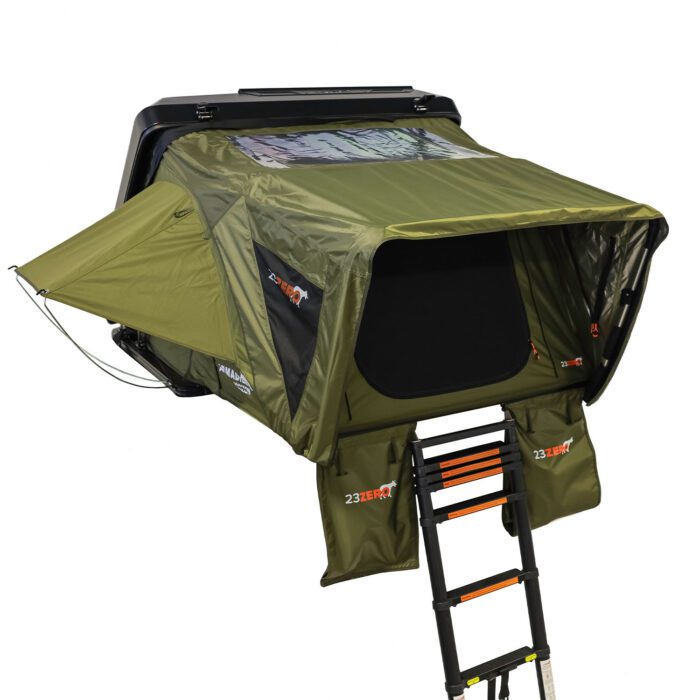
One example of how size and thoughtful design come together for families is the Walkabout 87 2.0.
With a massive sleeping platform capable of accommodating up to six adults, the Walkabout 87 2.0 offers the kind of real, usable space families need. Its extra-wide footprint allows kids to sleep comfortably without crowding, while dual entrances and two ladders make getting in and out easier for everyone.
Climate-focused features like large windows, Light Suppression Technology fabric, and a rear heater or cooler port help manage interior comfort across seasons. Combined with reinforced construction and weather-resistant materials, the tent is built to perform in the unpredictable conditions families often encounter.
Rather than forcing families to adapt to a small tent, larger designs like this adapt to how families actually camp.
How families actually use a large rooftop tent
In real-world use, large rooftop tents open up flexible sleeping arrangements that simply aren’t possible in smaller designs.
Two adults and two kids can spread out comfortably. Larger families can sleep together without stacking bodies or gear. Kids can fall asleep earlier while parents still move around inside the tent. Sleeping orientations can change from night to night based on who needs more room.
That flexibility makes trips feel easier and less restrictive—especially over multiple nights.


Common concerns parents have about rooftop tents
It’s normal for parents to have questions before committing to a rooftop tent.
Many wonder about safety, ladder access, or whether a larger tent will feel cumbersome day-to-day. Others worry about weather performance or how kids will handle sleeping off the ground.
The reality is that these concerns often come down to design and size. Tents with adequate space, multiple access points, solid weather protection, and thoughtful layouts tend to feel more intuitive and less stressful for families—especially when compared to cramped alternatives.
Who large family rooftop tents are best for (and who they’re not)
Large rooftop tents work especially well for:
- Families of four to six
- Multi-day or extended trips
- Base-camp-style overlanding
- Parents prioritizing shared space and comfort
They may be less ideal for solo travelers, ultra-minimalist builds, or vehicles where a low profile is the top priority.
Being honest about fit helps families choose gear that truly matches their style of travel.
Family overlanding works better when everyone fits
Family overlanding is about shared experiences—long drives, campfire dinners, and mornings spent together outdoors. The right rooftop tent supports those moments instead of adding friction.
For families, size isn’t a luxury. It’s a requirement. Choosing a rooftop tent with enough space allows everyone to sleep comfortably, move freely, and focus on the adventure itself.
Related Reading
Planning your first trips with kids? Our guide to camping with kids covers practical tips for keeping family adventures comfortable, fun, and stress-free.
Family Overlanding & Rooftop Tent FAQs
Can families use rooftop tents?
Yes. Many families use rooftop tents successfully, especially when the tent offers enough sleeping space, proper ventilation, and easy access. Larger soft-shell rooftop tents are often better suited for families because they provide more usable interior room for multiple sleepers.
How many people can sleep in a rooftop tent?
Rooftop tent capacity varies by design. While many models are intended for one or two adults, larger rooftop tents can comfortably sleep four to six people. The key is looking beyond capacity ratings and focusing on actual mattress width and usable space.
Are rooftop tents safe for kids?
Rooftop tents can be used safely with kids when parents choose a well-built tent, supervise ladder use, and follow manufacturer guidelines. Features like sturdy ladders, solid construction, and adequate interior space help make rooftop tents more manageable for families.
What makes a rooftop tent family-friendly?
Family-friendly rooftop tents typically offer wider sleeping platforms, good ventilation, multiple access points, interior lighting, and enough room for kids to move without crowding. These features help reduce nighttime disruptions and improve overall comfort.
Are soft-shell or hard-shell rooftop tents better for families?
Soft-shell rooftop tents are often a better fit for families because their fold-out designs create more sleeping space. Hard-shell tents work well for couples and solo travelers but usually offer less interior room for multiple sleepers.
Happy Camping!
Enjoyed This Post?
Discover more tips, gear guides, product reviews, and overlanding insights from the 23ZERO team.
Explore the Blog →If you’re new to overlanding or vehicle-based camping, it’s a fair question to ask: Why buy a rooftop tent? Let’s get into it.
At first glance, a tent that mounts on top of your vehicle might seem unnecessary—or even excessive—compared to a traditional ground tent or swag. But once people understand why rooftop tents exist and how they’re actually used, the value becomes much clearer.
This guide is designed to answer real questions from real campers—whether you’re brand new to the concept, actively comparing options, or simply trying to decide if a rooftop tent is worth it for you.
What is a Rooftop Tent?
A rooftop tent (often called an RTT, or roof tent) is a tent that mounts to your vehicle’s roof rack or bed rack and deploys into a raised sleeping platform. Instead of sleeping on the ground, you sleep above it—securely attached to your vehicle.
Most rooftop tents include:
- An integrated mattress
- A fold-out or pop-up design for quick deployment and fast setup
- A ladder for easy access
- A durable hard shell or soft shell fabric built for extended outdoor use
They’re commonly used on SUVs, trucks, cars, trailers, and crossovers, and they’ve become a staple in overlanding and adventure travel setups around the world.


Why Do People Buy Rooftop Tents?
People don’t switch to rooftop tents because they want to camp harder. They switch because they want to camp simpler, more comfortably, and more consistently.
Here are the real reasons rooftop tents continue to grow in popularity.
1. Faster, Easier Setup at Camp
One of the biggest advantages of a rooftop tent is how quickly it sets up and packs away.
With a ground tent, you’re typically:
- Clearing rocks and debris
- Laying out a footprint
- Assembling poles
- Hammering stakes
- Repeating the process in reverse the next morning
A hard shell rooftop tent deploys in minutes—often under two—without touching the ground. That convenience matters whether you’re:
- Arriving late
- Moving campsites frequently
- Camping in bad weather
- Or just tired after a long day on the trail
2. A Consistent, Comfortable Sleeping Surface
Sleeping comfort is one of the most overlooked aspects of camping—until you get a bad night’s sleep. Everyone wants a home away from home, roof tents provide that exact feeling and comfort.
Rooftop tents offer:
- A built-in mattress (no inflating, deflating, or guessing)
- A flat, level sleeping surface every night
- Separation from rocks, roots, mud, and standing water
You’re not relying on the ground to cooperate. The experience is predictable—and that consistency is a big reason many people stick with rooftop tents once they try one.
3. Elevated Sleeping Has Practical Benefits
Sleeping off the ground isn’t just a novelty—it solves real problems.
Elevation helps with:
- Staying dry in wet conditions
- Avoiding uneven or muddy terrain
- Reducing exposure to insects and critters
- Improving airflow and ventilation
While no tent is “wildlife-proof,” many campers feel more secure sleeping above ground, especially in unfamiliar environments.
4. Camp Almost Anywhere Your Vehicle Can Go
Rooftop tents shine in places where ground camping is inconvenient or limited.
They’re ideal for:
- Rocky or uneven terrain
- Hard-packed soil where stakes don’t work
- Designated vehicle-based camping areas
- Quick overnight stops while traveling
If you can park legally and safely, you can usually camp. That flexibility is a major draw for people who value mobility and freedom.
Rooftop Tent vs Ground Tent: What’s the Difference?
Traditional ground tents or swags still have their place—but they aren’t always the better option.
Ground Tents
Pros
- Lower upfront cost
- Lightweight and portable
- Works without a vehicle
Cons
- Longer setup and breakdown
- Comfort depends heavily on terrain
- More exposure to weather and moisture
Rooftop Tents
Pros
- Fast setup and pack-down
- Built-in comfort and structure
- Consistent experience night after night
Cons
- Higher initial investment
- Requires a compatible vehicle and rack
- Less convenient for trips without your vehicle
The right choice depends on how you camp, not just how often.


Are Rooftop Tents Worth the Money?
This is one of the most common questions—and the answer depends on usage.
A rooftop tent is absolutely worth it if:
- You camp frequently or seasonally
- You value comfort and convenience
- You move camps often
- You want a durable, long-term setup
If you camp once a year at established campgrounds, a ground tent may make more sense. But for repeat campers or overlanders, the time saved and comfort gained often justify the investment.
Common Pros and Cons of Rooftop Tents
Pros
- Quick deployment
- Integrated mattress
- Elevated sleeping position
- Durable construction
- Long service life
Cons
- Higher upfront cost
- Added weight on your vehicle
- Requires rack compatibility
- Storage space when not in use
Being honest about these tradeoffs helps you make the right decision—not just the popular one.
Who Are Rooftop Tents Best For?
Rooftop tents tend to work best for:
- Weekend adventurers who camp often
- Overlanders and road-trippers
- Couples or small families
- People who want a “grab-and-go” camping setup
They may not be ideal for:
- Ultralight backpackers
- Campers without vehicle rack capacity
- Those who rarely camp
Understanding where you fit makes the decision much easier.


Common Rooftop Tent Questions (Answered)
Do you need a truck or SUV for a rooftop tent?
Most rooftop tents require a vehicle with proper roof load capacity and a quality rack system. Many SUVs, cars, crossovers, and trucks qualify.
Can you use a rooftop tent in winter?
Yes—many rooftop tents are designed for four-season use when paired with appropriate bedding and insulation.
Do rooftop tents hurt your vehicle?
When properly installed on a rated rack, rooftop tents are safe for your vehicle.
Is climbing a ladder annoying?
For most users, it becomes second nature. Ladder access is rarely cited as a deal-breaker once experienced. Think of it as a portable tree house on top of your car.
What to Know Before Buying Your First Rooftop Tent
Before purchasing, consider:
- Your vehicle’s dynamic and static load ratings
- Rack compatibility
- Hard shell vs soft shell designs
- Climate and seasonal use
- How often you plan to camp
A little planning upfront prevents regret later.
Final Thoughts: Why People Stick With Rooftop Tents
Rooftop tents aren’t about camping more aggressively. They’re about removing friction from the experience.
When setup is easier, sleep is better, and camp becomes more flexible, people tend to camp more often—and enjoy it more when they do.
That’s the real reason rooftop tents continue to grow in popularity and we expect that trend to continue for many years to come.
Rooftop Tent FAQs
If you’re considering a rooftop tent for the first time, these are the questions we hear most often—and the real-world answers that help you decide.
What is the point of buying a rooftop tent?
The main point of buying a rooftop tent is convenience, comfort, and consistency. Rooftop tents set up quickly, provide a flat and elevated sleeping surface, and let you camp comfortably in more places where ground conditions are uneven, wet, or rocky.
Are rooftop tents worth the money?
Rooftop tents are usually worth it for people who camp regularly and value fast setup, built-in comfort, and durability. While the upfront cost is higher than a ground tent, many users find the time saved, the consistent sleep quality, and the long service life justify the investment.
What are the pros and cons of a rooftop tent?
Pros include quick setup, an integrated mattress, elevated sleeping, and a more consistent camp experience. Cons can include higher cost, added vehicle weight, and needing a compatible rack system. The best choice depends on how often you camp and how you like to travel.
Do you need a truck or SUV for a rooftop tent?
You need a vehicle that can support the tent’s load ratings and a properly rated rack system. Many SUVs, trucks, and some crossovers work well. Always confirm your vehicle’s roof load limits and your rack’s weight ratings before purchasing.
Can you use a rooftop tent in winter?
Yes. Many rooftop tents can be used in winter when paired with appropriate bedding and insulation. Four-season designs are built to handle colder temperatures, wind, and snow more effectively than standard three-season tents.
Are rooftop tents safe?
Rooftop tents are safe when installed correctly on a quality rack system that meets your vehicle’s load ratings. They’re designed for stability in wind and weather and are widely used for overlanding and long-distance travel.
Do rooftop tents damage your vehicle?
When mounted to a properly rated rack and installed according to guidelines, rooftop tents should not damage your vehicle. The key is using the correct rack hardware, torqueing fasteners properly, and staying within rated limits.
Who should not buy a rooftop tent?
Rooftop tents may not be the best fit if you rarely camp, don’t have a compatible vehicle or rack setup, or prefer backpacking-style travel. If you typically camp in one place for long periods or need your vehicle free to drive daily from a base camp, a ground tent or camper setup may be a better match.
Happy Camping!
Enjoyed This Post?
Discover more tips, gear guides, product reviews, and overlanding insights from the 23ZERO team.
Explore the Blog →After more than 10 years in the overlanding industry, one thing we’ve learned is that the real test of gear doesn’t happen on day one. A proper 270 awning review only reveals itself months or years later — in windstorms, freezing mornings, muddy camps, and late-night pack-ups when you’re tired and ready to be done.
That’s why long-term reviews matter. Once the excitement of a new product wears off, all that’s left is how it actually performs — its real-world usability, durability, and whether it continues to earn its place on your rig. Adventure Built has built a reputation for honest, long-term gear reviews, so when they put the Peregrine PRO 270 through real-world use, we were eager to hear their perspective.
In this recent long-term review, Kelly from Adventure Built summed up his experience with the 23Zero Peregrine PRO 6 Arm 270 Degree Awning in a way we hear often from seasoned users:
“It’s an absolute beast.”
That statement alone doesn’t come lightly — and what follows in his review aligns closely with why this awning was designed the way it was, as always MADE BETTER.
270 Awning Review: Built to Stay Quiet, Tight, and Out of the Way on the Road
One of the first things Adventure Built points out isn’t deployment or coverage — it’s the storage bag.
That’s intentional.
“If you really pay attention, you’ll notice that the storage bag itself is actually fitted really tightly to the contour of the awning when it’s in the stowed position.”
That tight fit serves a purpose. Over a decade of overland travel, we’ve seen what loose awning bags do:
- They flap in the wind
- They snag on brush
- They wear and tear prematurely
As Adventure Built explains:
“That allows it to not flap around in the wind… it doesn’t have little waves in the bag to catch on things to rip and tear.”
Even the zipper gets called out — something most people don’t think about until it fails:
“Even with all the dirt and mud and muck up here in Montana, it has never gotten stuck on me.”
That’s not accidental. Zippers, fabric tension, and stitching are some of the most common long-term failure points — and we design accordingly.
Straightforward Mounting with Real-World Flexibility
Mounting an awning shouldn’t require guesswork.
Adventure Built describes the core system clearly:
“The whole awning is mounted to an extrusion plate that is nice and rigid… it’s just a really slick, easy assembly and installation on any rack.”
He chose a quick-release solution for his setup, which highlights another real-world need — flexibility:
“It’s easy to get on, easy to get off… and the brackets are actually lockable, which is even more secure.”
Whether your awning lives permanently on your rig or comes off between trips, that adaptability matters.


Deployment That Makes Sense When You’re Actually Camping
Once deployed, the Peregrine PRO 6 Arm 270° Awning shows its strength — literally and figuratively.
Adventure Built walks the full span of the awning and notes the sheer size:
“One of the great things about this awning is how much coverage you get. This thing is massive.”
And because of the mounting height on his vehicle:
“I can’t even touch it when I’m walking underneath it… I feel like I’m in the Taj Mahal.”
That height and coverage translate into usable space — space where you’re not hunched over, dodging poles, or rearranging gear just to move around camp.
Wind, Storms, and Why Structure Matters
This is where long-term experience separates marketing from reality.
Adventure Built recounts a real storm scenario:
“I got in a windstorm at Northwest Overland Rally. A lot of people lost tents and awnings. This thing didn’t even budge.”
He goes on to explain:
“There wasn’t a creak out of it. I had full confidence this thing wasn’t going anywhere.”
That confidence comes from the trellis-style arm design, which distributes load and resists twisting — a feature born from years of watching where other designs fail.
270 Awning Review: Shade That Actually Works in the Heat
Shade alone isn’t enough — especially in summer.
Adventure Built highlights Light Suppression Technology (LST):
“It blocks out almost all of the sunlight coming in, both UVA and UVB rays.”
And more importantly, why that matters:
“Even in the hot summers, this is going to give you a good reprieve in a nice shaded spot.”
Blocking radiant heat is what turns an awning into a true expanded living space, not just a visual cover.


Accessories That Solve Real Problems
Small design details often make the biggest difference.
One example Adventure Built points out is the rear flap:
“This allows you to really extend this over the tailgate… it bridges that gap so you have perfect waterproof covering.”
That’s the kind of detail that only shows up after years of water running where you didn’t want it.
He also mentions modifying the tie-down system for his specific rack setup — a reminder that no two rigs are the same, and good gear should adapt.
Integrated Lighting That Isn’t an Afterthought
Lighting is another feature that often gets added late. Not here.
“These lights aren’t a 3M-taped-in afterthought — they’re actually integrated into the bars.”
Adventure Built explains the system clearly:
- Multiple color modes
- Adjustable brightness
- A clean, inclusive wiring harness
“They put out a ton of light… it’s just a really great system that is not going to fail you.”
The One Honest Critique — and Why It Exists For Awning Reviews
No long-term review is complete without criticism — and we welcome it.
Adventure Built calls his gripe “super nitpicky,” but it’s worth acknowledging:
“When it gets cold, the fabric gets a little bit harder to roll up nice and tightly… it just makes it a little more time-consuming.”
He also immediately explains why:
“What makes that bag so great is also kind of the issue in cold and wet weather.”
This is the tradeoff of a tight, aerodynamic storage bag. We’ve always believed honest feedback like this is how good products become great ones.
Watch the Long-Term Review
Prefer to see the Peregrine PRO 270 in action? Watch Adventure Built’s full long-term review below, where he walks through real-world use, setup, weather performance, and the details discussed above.
Video courtesy of Adventure Built — long-term field review of the 23Zero Peregrine PRO 270 Awning.
270 Awing Review: What We’ve Learned After a Decade in Overlanding
When someone who’s spent real time living with their gear says,
“It’s an absolute beast.”
—we pay attention.
The Peregrine PRO 6 Arm 270 Degree Awning isn’t designed for trends, shortcuts, or weekend impressions. It’s built for overlanders who camp often, travel far, and rely on their equipment when weather, terrain, and conditions aren’t ideal.
After more than 10 years in the overlanding industry, that’s the standard we design to — because when you’re miles from home, your gear doesn’t get excuses.
For additional perspective, Overland Expo published an early field review of the Peregrine 270 awning that’s worth reading alongside Adventure Built’s long-term experience.
Looking for More 270° Awning Options?
While the Peregrine PRO 270 remains a proven overland performer, 23Zero also offers the newer Onyx 270 Awning Series — a freestanding 270° platform designed for modular wall integration and side-specific configurations. Explore the Onyx Series to compare features and find the right setup for your vehicle.
Happy Camping!
Enjoyed This Post?
Discover more tips, gear guides, product reviews, and overlanding insights from the 23ZERO team.
Explore the Blog →Every year, SEMA gives us a look at where the overland world is headed — not just in terms of style, but real-world capability. At SEMA 2025, a truly standout overland build isn’t just about turning heads; it’s about how thoughtfully the vehicle is put together and how realistically it’s meant to be used.
In a recent article, Hagerty highlighted five standout overland builds from SEMA 2025 — and we were honored to see 23Zero rooftop tents featured on two of them. One of those builds came from Cognito Motorsports, presented in the Randy’s WorldWide booth, and built around a seriously capable GMC Sierra HD AT4X. The other appearance came through LiquidSpring, where a Walkabout soft shell rooftop tent was showcased on a Polaris Xpedition ADV as part of an advanced suspension and vehicle-control display.
When respected builders and trusted automotive voices independently arrive at similar solutions, it’s usually not by accident. Whether it’s a rooftop tent, awning, shower, or supporting accessory, it’s a reflection of what works in the real world — and the kind of builds 23Zero is proud to be part of every step of the way. Let’s take a closer look at what’s driving that consistency.
What Hagerty Highlighted About the Cognito Motorsports SEMA 2025 Overland Build
Hagerty described the Cognito Motorsports GMC Sierra HD AT4X as a “herculean machine” — and for good reason. Heavy-duty trucks like the Sierra HD bring something unique to overland builds: massive payload capacity paired with long-distance durability.
According to Hagerty, this build was showcased as part of the Randy’s WorldWide booth, with Cognito Motorsports serving as the presenting builder. Randy’s WorldWide oversees a portfolio of respected aftermarket brands, including Cognito Motorsports, Carli Suspension, and ICON Vehicle Dynamics — names that carry real weight in the off-road and overland space.
What stood out to us wasn’t just the hardware underneath the truck, but how the build was finished: purpose-driven, balanced, and ready for extended travel. That’s exactly where a rooftop tent needs to earn its place.
Why Heavy-Duty Overland Builds Are Ideal for Rooftop Tents
When people think about overland vehicles, midsize trucks and SUVs often come to mind first. But heavy-duty platforms are increasingly finding their place in serious overland travel — especially when long trips, heavy gear, and self-sufficiency are priorities.
HD trucks offer:
- Higher payload ratings to comfortably support rooftop tents and gear
- Greater stability for vehicle-mounted tents
- Improved durability for long-distance travel
- Room for supporting upgrades like suspension, storage, and auxiliary power
A rooftop tent on a heavy-duty truck isn’t about excess — it’s about confidence. Confidence that your setup can handle terrain, weather, and miles without compromise.
Why Cognito Motorsports Chose a 23Zero Rooftop Tent and Awning
Professional builders don’t select components at random — especially on SEMA builds where every detail is scrutinized. Rooftop tents and awnings need to strike the right balance between weight, strength, usability, and reliability, and they have to perform in real conditions, not just under show lights.
For the Cognito Motorsports GMC Sierra HD AT4X, that balance came in the form of a complete 23Zero overlanding shelter setup. The build features one of our hard-shell clamshell-style rooftop tents — the Kabari XL — paired with a Peregrine 270-degree awning to create a cohesive, expedition-ready living space around the vehicle.
Designed with larger vehicles and longer journeys in mind, the Kabari XL complements a heavy-duty overland build without adding unnecessary complexity. Its hard-shell construction, efficient footprint, integrated roof bars, and quick deployment support the kind of travel this truck was built for — extended routes, changing terrain, and nights spent off the grid.
The addition of a 270° awning expands that capability even further, providing fast-deploying coverage around the vehicle for shelter, camp setup, and weather protection. Together, the tent and awning function as a unified system — not accessories, but essential components of a serious overland build viewed by many at SEMA 2025.
That’s why seeing 23Zero rooftop tents and awnings featured across multiple Hagerty recognized SEMA builds matters to us.
Our roof tent and awning systems are built to:
- Support extended overland travel
- Handle changing weather and terrain
- Integrate cleanly into serious vehicle builds
- Deliver comfort without unnecessary complexity
We don’t build rooftop tents and awnings to be flashy. We build them to be used — whether that’s on a weekend trip or a cross-country expedition.


Two Hagerty-Recognized SEMA 2025 Overland Builds. One Common Thread.
The Cognito Motorsports build wasn’t the only Hagerty featured overland rig running 23Zero gear.
Hagerty also highlighted the aFe Power SEMA 2025 build, which featured a 23Zero rooftop tent as part of a complete, performance-focused overland setup in their 5(ish) Excellent Overland Builds from SEMA 2025 article.
If you missed that one, you can check it out here:
👉 SEMA 2025: aFe Power Features 23Zero
Seeing 23Zero tents show up on two of Hagerty’s five standout overland builds tells us something important: when builders are free to choose what works best, they consistently prioritize reliability and real-world function.
SEMA 2025 Overland Build Walkaround: Cognito Motorsports & LiquidSpring
This quick clip highlights how 23Zero rooftop tents appear across multiple SEMA 2025 builds. Alongside the Cognito Motorsports overland truck, it also features a Walkabout soft shell rooftop tent mounted on a Polaris Xpedition ADV at the LiquidSpring booth — a platform showcasing Smart Suspension™, RideSync™, Tru-Earth Leveling®, and a fully enclosed, climate-controlled cab built for serious off-road travel. In both cases, the tent isn’t an afterthought, but a core part of an expedition-ready overlanding setup.
What This Says About the Future of SEMA Overland Builds
Overlanding continues to evolve. What started as lightweight weekend setups is now expanding into professional-grade, long-range vehicles built to travel farther and stay out longer.
We’re seeing:
- More heavy-duty platforms entering the overland space
- Greater emphasis on payload management and durability
- Rooftop tents treated as essential gear, not optional add-ons
SEMA 2025 made one thing clear: thoughtful overland builds are no longer about trends — they’re about trust in the components that carry you forward.


Final Thoughts
We’re proud to see 23Zero rooftop tents and shelter gear featured alongside respected builders and trusted automotive voices at SEMA 2025. Being represented on two of Hagerty’s standout overland builds isn’t something we take lightly — it reinforces a belief we’ve held from the beginning: when you build gear to perform in the real world, professionals take notice.
From heavy-duty overland trucks to innovative off-road platforms, the common thread is thoughtful design, proven reliability, and equipment chosen with intention. That’s the space 23Zero aims to live in — building products that support real travel, real conditions, and real adventure.
If you’re exploring a rooftop tent or shelter setup for your own overland build, looking at what experienced builders choose — and understanding why they choose it — is one of the best places to start.
Happy Camping!
Enjoyed This Post?
Discover more tips, gear guides, product reviews, and overlanding insights from the 23ZERO team.
Explore the Blog →If you’re new to overlanding, vehicle based travel, or exploring the world of rooftop tents, it’s completely normal to wonder: what’s the difference between hard shell vs soft shell tents and which style is better for my travels?
At 23Zero, we hear this question every day from people building their first rigs or upgrading from ground tents. Both styles work incredibly well as a tent on top of your car (also called vehicle roof tents, roof tents for cars, overlanding tents, and all kinds of variations), but they offer different benefits depending on how you camp and what you camp with.
Let’s dive into the most common questions — and give you clear, experience-based answers you can trust.
What’s the Difference Between a Hard Shell and a Soft Shell Rooftop Tent?
The main difference comes down to structure and function:
Hard Shell Rooftop Tents
Open and close using a rigid top and bottom shell. They’re fast, simple, and incredibly durable.
Soft Shell Rooftop Tents
Fold out using a fabric body supported by poles and frames. They offer more space options, weight reduction, and better value.


")
")
Both get you off the ground, away from uneven terrain, and into a comfortable sleeping setup — the best style depends on how you travel and what you travel with.
Which Rooftop Tent Is More Convenient: Hard Shell or Soft Shell?
If convenience is your top priority, a hard shell rooftop tent wins every time.
Soft shells typically take around eight minutes to tuck, fold, zip, and cover — not difficult, but still a process that you can perfect overtime.
Hard shells tents, like our Armadillo series or Kabari series, require almost no effort. Simply close the lid, latch it, and the internal elastic pulls the fabric inside.
Choose a hard shell if you want:
- Fast setup/pack-down
- Minimal hassle at camp
- Easy daily movement between campsites
This level of convenience is why many overlanders upgrade to a hard shell tent over time.
Which Rooftop Tent Offers More Sleeping Space?
When it comes to hard shell vs soft shell rooftop tents if you need more sleeping room, soft shell rooftop tents are the clear winner.
Soft shells offer a wide range of mattress sizes and internal layouts — everything from compact two-person setups to massive family-ready models. Our Walkabout series includes:
Hard shell models, because of their rigid design, offer fewer sizing options. Most are built comfortably to sleep two or three people.
Choose a soft shell if you want:
- Maximum sleeping space
- Family-friendly tent design (our Walkabout 87 fits up to 6 people!)
- Multiple size options
If interior space is your priority, soft shells are unmatched.
Why Are Hard Shell Rooftop Tents More Expensive?
Many customers notice that hard shell tents cost nearly twice as much as soft shell tents. There’s a good reason for that.
Hard shells require:
- Molded lids
- Welded aluminum
- Reinforced shells
- Gas struts or hinge systems
- Complex hardware
- Precision engineering
Soft shells use durable fabric and a simpler lightweight frame structure — which reduces production cost.
Typical comparison:
- Soft shell Walkabout 72 2.0 roof tent→ ~$2,695
- Hard shell Armadillo H2 roof tent→ ~$3,995


You’re paying for speed, durability, and ease of use.
Do Hard Shell vs Soft Shell Rooftop Tents Improve Aerodynamics?
Surprisingly, not as much as most people expect.
Both styles usually close down to roughly 13–15 inches in height. While hard shells can be slightly sleeker, real-world aerodynamic differences are minimal.
You won’t see major fuel savings strictly from choosing one style over the other.
Aerodynamics takeaway:
Pick your tent based on convenience and space, not aerodynamics.
Is a Rooftop Tent Right for Every Camper?
Not always — and that’s perfectly okay.
While rooftop tents are an amazing way to turn your vehicle into an overlanding basecamp, some travelers prefer ground-based shelters. Others don’t want anything mounted to their roof. Some solo travelers want something smaller and easier to transport.
That’s why 23Zero designs more than just rooftop tents.
What Is a Swag, and When Should You Choose One Instead of a Rooftop Tent?
A swag or bedroll is a compact, all-in-one ground shelter with a built-in mattress, poles, and heavy-duty fabric. Think of it as a rugged, comfortable portable bedroll that sets up in seconds.
Swags are incredibly popular in Australia and rapidly growing in the U.S. overlanding community.
A swag may be better than a rooftop tent if you:
- Camp solo
- Want a budget-friendly shelter
- Prefer sleeping closer to the ground
- Don’t want gear mounted on your vehicle’s roof
- Need something lightweight and portable
- Camp in areas where a RTT isn’t practical
23Zero swags feature the same high-quality materials we use in our tents, including our LST® Light Suppression Technology.


Swags also pair beautifully with vehicle roof tent setups: rooftop tent for the adults — swag for the kids, dogs (Woof Den), or extra guests.
How Do You Choose the Best Tent for Your Vehicle and Camping Style?
Here’s a simple breakdown to help guide your decision.
✔️ Choose a Hard Shell Rooftop Tent if you want:
- The fastest setup possible
- Minimal daily effort
- A durable, compact design
- Ease of movement between campsites
✔️ Choose a Soft Shell Rooftop Tent if you want:
- More sleeping space
- Best value for price
- Family-friendly layouts
- Classic fold-out tent ergonomics
✔️ Choose a Swag if you want:
- A simple, ground-based shelter
- Maximum portability
- Something rugged, quick, and versatile
Final Thoughts: What Does 23Zero Recommend?
No matter whether you choose a hard shell rooftop tent, a soft shell rooftop tent, or one of our premium swags, the goal is always the same:
“Spend more time enjoying the outdoors and less time dealing with your gear“
At 23Zero, every shelter we design is built with real overland travel in mind — durable materials, thoughtful layouts, and features that make setup easier, sleep more comfortable, and mornings simpler. Whether you’re heading out for a weekend escape or planning long-distance adventures, your shelter should work with you, not against you.
Every traveler’s setup is different. Some prioritize speed and convenience. Others want maximum space or a more minimalist approach. That’s why we offer a full range of vehicle roof tents and ground-based options — so you can choose the shelter that truly fits your style of travel, your vehicle, and the way you explore.
If you’re still deciding, you don’t have to figure it out alone. Our team is always happy to help you compare options, answer questions, and find the right 23Zero setup to match your adventures — wherever the road takes you next.
Frequently Asked Questions About Rooftop Tents & Swags
Is a hard shell or soft shell rooftop tent better?
Neither option is universally better — it depends on how you travel. Hard shell rooftop tents prioritize fast setup and convenience, while soft shell rooftop tents offer more interior space and better value for families or longer stays.
Are rooftop tents good for beginners?
Yes. Rooftop tents are a great entry point into overlanding because they provide a comfortable, elevated sleeping area and quick setup compared to traditional ground tents. Soft shell rooftop tents are often the most beginner-friendly due to their space and affordability.
Why are hard shell rooftop tents more expensive?
Hard shell rooftop tents use rigid shells, precision hardware, and mechanical lift systems that increase durability and ease of use. These features add to the cost but also reduce setup time and daily effort.
Do rooftop tents affect fuel economy?
Any tent mounted on top of a vehicle will create some aerodynamic drag, but most rooftop tents — hard shell or soft shell — sit at a similar closed height. In real-world use, fuel economy differences between styles are minimal.
Is a rooftop tent right for every camper?
Not always. Some travelers prefer ground-based shelters, don’t want gear mounted on their roof, or want a simpler setup. That’s why 23Zero offers alternative options like swags for different camping styles.
What is a swag and how is it different from a rooftop tent?
A swag is a compact, all-in-one ground shelter with a built-in mattress. Swags are ideal for solo travelers, minimalist setups, or anyone who wants a durable shelter without mounting a tent on top of their vehicle.
Can you use a swag and a rooftop tent together?
Absolutely. Many campers use a rooftop tent as their primary sleeping space and a swag as an additional option for guests, kids, or solo trips. This combination offers flexibility without compromising comfort.
Hard Shell vs. Soft Shell Rooftop Tents – Video Overview
Still deciding between a hard shell and soft shell rooftop tent? Watch this video from 23Zero as we walk through the real-world differences between these two popular styles of vehicle roof tents, including setup time, sleeping space, price considerations, and which type of roof tent for cars works best for different overlanding needs.
This video is ideal for anyone new to overlanding or researching tents that mount on top of a vehicle. It complements the guide above by visually demonstrating how hard shell and soft shell rooftop tents function, helping you make a confident decision for your next adventure.
Happy Camping!
Enjoyed This Post?
Discover more tips, gear guides, product reviews, and overlanding insights from the 23ZERO team.
Explore the Blog →Every year, SEMA sets the tone for where the automotive and off-road world is headed, and 23Zero at SEMA is a perfect reflection of that momentum. It’s where innovation meets spectacle, where fabrication skill becomes rolling art, and where the most capable overland rigs in the country get their moment under the lights.
For 2025, one build stole the attention of overlanders and truck enthusiasts alike: AFE Power’s Ram 1500 RHO Overland rig, equipped with a trio of premium 23Zero products — the Armadillo Horizon 2 rooftop tent, the Peregrine PRO 6 Arm 270° Awning (Right), and the Rask Camping Shower Tent.
For us at 23Zero, seeing our overlanding gear featured on a SEMA build isn’t just exciting — it’s a testament to the performance, durability, and trust our products have earned in the overland community. For a deeper dive into the performance upgrades and fabrication details behind this rig, you can explore AFE Power’s full Ram RHO Overland Build breakdown on their website.
The AFE Power Ram 1500 RHO — A 540-HP Overland Beast
The Ram 1500 RHO is already a headline grabber, engineered around the twin-turbo 3.0L Hurricane engine putting out a staggering 540 horsepower and 521 lb-ft of torque. AFE Power didn’t just refine it — they pushed it further.
Their 2025 SEMA build showcased:
- AFE cold air intakes
- AFE exhaust systems
- AFE performance electronics
- AFE skid plates and protection
- A complete overland equipment suite
The result? A truck that pulls double duty: part desert-runner, part expedition-ready overlander — a perfect platform for showcasing real-world capable gear.


Why 23Zero SEMA Overland Builds Matter
SEMA is more than a show — it’s a proving ground. The rigs that earn spotlight placement are the ones builders trust to represent innovation and functionality in front of the entire industry.
Overland-specific builds have surged in popularity at SEMA, reflecting a massive shift in consumer interest toward:
- purpose-built adventure rigs
- functional camping systems
- premium rooftop tents
- adaptable shelter solutions
- off-road ready comfort
AFE’s decision to build their RHO as an overland rig — not just a performance truck — shows just how dominant the overlanding category has become and it’s clear it’s here to stay.
23Zero Gear Featured on the 2025 AFE Power SEMA Build
SEMA rigs don’t get built with “good enough” equipment. Everything selected has to be show-worthy, rugged, reliable, and visually striking. Here’s the gear AFE chose from 23Zero to complete their RHO build.


Armadillo Horizon 2 — The Premium Hardshell Rooftop Tent Setting the 2025 Benchmark
The Armadillo Horizon 2 wasn’t just placed on this SEMA build — it was featured.
Widely regarded as the best rooftop tent of 2025, the Horizon 2 represents the next generation of hardshell roof tent design, earning its reputation among overlanders, reviewers, and industry insiders for its:
- lightning-fast deployment
- exceptional four-season durability
- rugged aluminum hardshell construction
- aerodynamic profile ideal for cars, trucks, and off-road vehicles
- class-leading interior comfort
For a build where both form and function matter, the Armadillo Horizon 2 delivers on every front. It looks right at home atop the RHO — purposeful, refined, and expedition-ready.
This is exactly the type of tent SEMA rigs are built to highlight: premium craftsmanship with real-world performance at its core.

Armadillo Horizon 2: Premium Hardshell Rooftop Tent for All-Season Adventure (Left Open Only)
In stock (can be backordered)
–
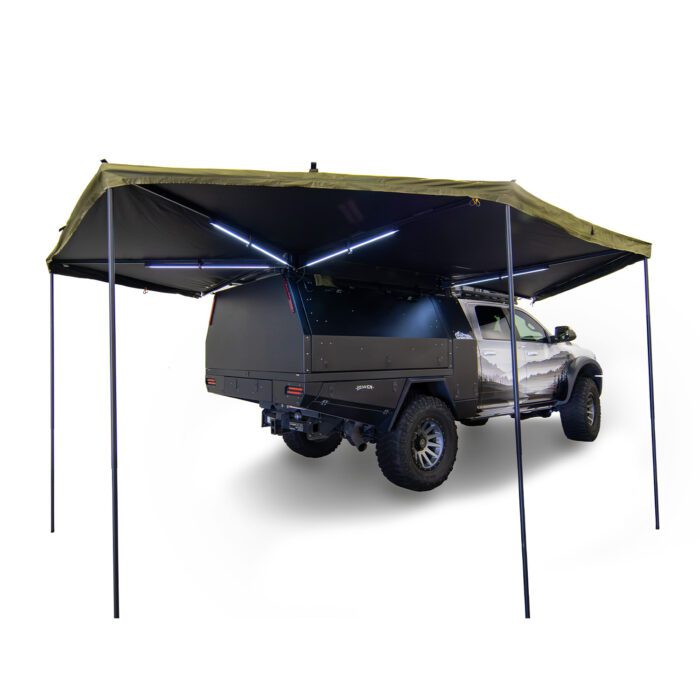
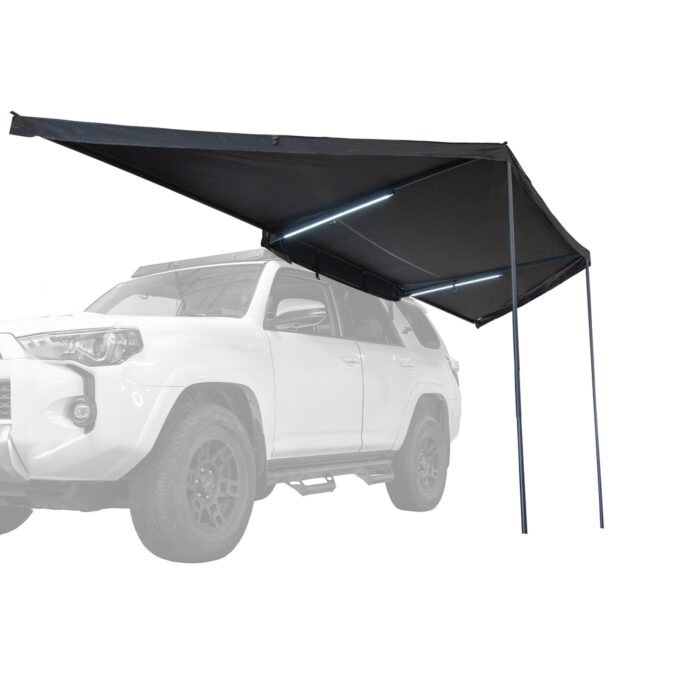
Peregrine PRO 6 Arm 270° Awning — Right Side Coverage, Show-Stopping Presence
If the Horizon 2 is the hero, the Peregrine PRO 6 Arm 270° Awning is its perfect counterpart.
On the AFE Power build, the right-side deployment gave the RHO a massive footprint of usable shelter — an essential piece of any proper overland system. The awning delivers:
- a true 270-degree freestanding coverage arc
- reinforced hinges and arms for rugged environments
- rapid deployment
- excellent wind resistance
- a visually dominating presence ideal for show builds
Even on a floor crowded with overland gear, the Peregrine PRO’s structure and geometry make it instantly recognizable.

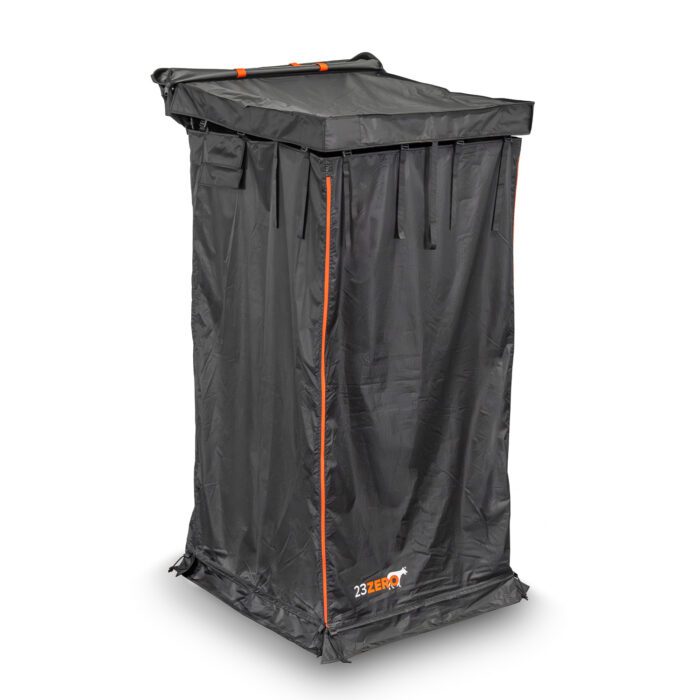
Rask Camping Shower Tent — Compact, Functional, and SEMA-Ready
Great overland rigs are built on systems, and the Rask Shower Tent ties the build together with a modular, private enclosure that works for showers, changing, or quick roadside gear swaps.
Its small footprint expands into real-world usability — exactly the type of accessory that elevates a SEMA build from “cool display” to “complete overland solution.”

23Zero From SEMA Showcase to Real-World Adventure
The best part about AFE’s 2025 SEMA RHO build is this:
Everything showcased is functional.
These aren’t props or custom one-off fabrications — they are real pieces of equipment that overlanders use every day.
- The Horizon 2 provides an unmatched sleeping environment.
- The Peregrine PRO 6 creates essential all-weather shelter.
- The Rask Shower Tent adds privacy and versatility to overlanding and camp setups.
This SEMA build represents the exact blend of capability and comfort modern overlanders demand.
Inspired by the AFE Power SEMA Build? Here’s How to Build Your Own Rig
If this RHO build has your wheels turning, here’s where to start:
- Armadillo Horizon 2 Premium Hardshell Roof Tent — the best roof tent for 2025
- Peregrine PRO 6 Arm 270° Awning (Right) — unmatched coverage
- Rask Camping Shower Tent — the foundation of privacy for any full camp system
Pair these with the right suspension, armor, and gear upgrades, and you’ll be well on your way toward a capable, comfortable, SEMA-inspired overland rig.
What This SEMA Build Means for 23Zero
Seeing 23Zero gear on a SEMA build — especially one from AFE Power — is more than a milestone. It’s validation. To learn more about who we are and what drives our innovation, explore the story behind 23Zero.
It shows that:
- our products meet the demands of high-performance builders
- our designs stand out in one of the most competitive environments in the industry
- the overlanding world recognizes 23Zero as a leader in premium outdoor gear
The 2025 SEMA Show highlighted innovation, craftsmanship, and capability — and we’re proud that 23Zero was part of a build that captured all three.
Here’s to many more rigs, adventures, and milestones ahead.
Watch the AFE Power SEMA 2025 Recap
AFE Power’s official SEMA 2025 recap featuring the Ram 1500 RHO Overland Build equipped with 23Zero’s Horizon 2, Peregrine PRO 270° Awning, and Rask Shower Tent
To see more of the builds and behind-the-scenes moments from this year’s show, you can also visit AFE Power’s official SEMA 2025 recap article.
👉 Read next: SEMA 2025 Overland Build Walkaround: Cognito Motorsports & LiquidSpring
Happy Camping!
Enjoyed This Post?
Discover more tips, gear guides, product reviews, and overlanding insights from the 23ZERO team.
Explore the Blog →The holidays are here — and if you’ve got an overlander, camper, or adventure-obsessed explorer on your list, you already know they can be impossibly hard to shop for. You’re probably searching for the best gifts for overlanders, and that’s no easy task. They don’t want more “stuff”… they want gear that holds up to dust, wind, rain, and every surprise a backcountry trail can throw their way.
That’s why we put together this festive gift guide filled with the best gifts for overlanders this season. Whether you’re shopping for stocking-friendly essentials, mid-range upgrades, or the kind of premium gear that earns you “gift of the year” bragging rights, each pick is rugged, trail-ready, and genuinely useful.
So grab some cocoa, get cozy, and let’s find the perfect gift for the adventurer in your life — at every budget.
Jump to a section:
Overlanding Must Haves Under $150 | Overlanding Must Haves Under $750 | Overlanding Must Haves Above $750
Best Gifts for Overlanders Under $150
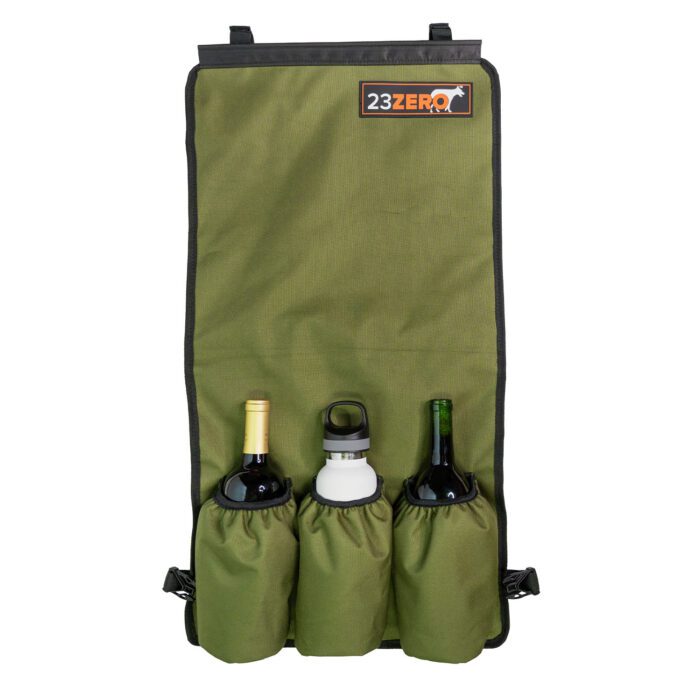
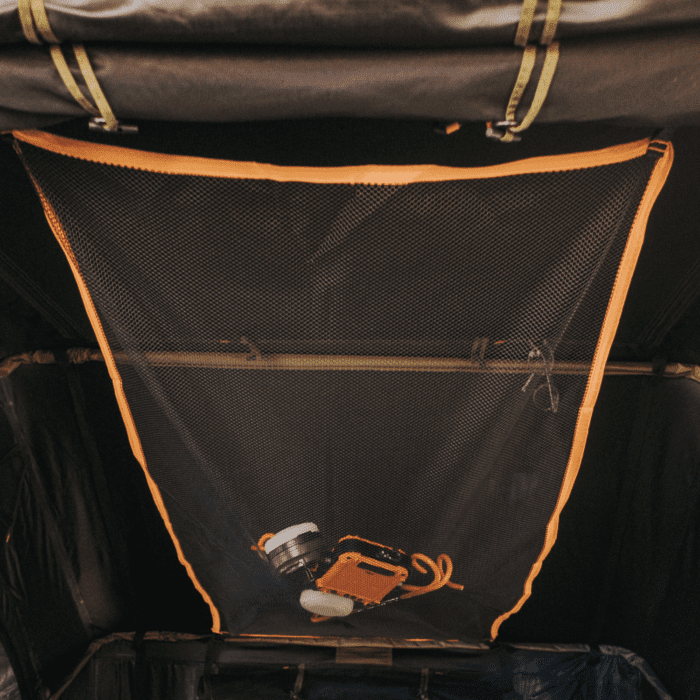
Not every great overlanding gift has to break the bank — in fact, some of the most useful upgrades are also the most affordable. This section highlights trail-tested essentials like our Dirty Gear Bag for smarter exterior vehicle storage, the LED Solar Tent Light for illuminating camp, and the Royal Sleeping Bags for cozy nights under the stars. You’ll also find thoughtful add-ons like our Bottle Sling, Soft Shell Gear Loft, and Kitchen and Utensil Hanger Set — small gifts that deliver big convenience on every trip. Perfect for stocking stuffers, “just because” surprises, or simple ways to make someone’s next adventure smoother and more enjoyable, consider these among the very best gifts you can find for enthusiastic overlanders and also those seeking the best gifts for overlanders in particular.
Overlanding Must Haves Under $150
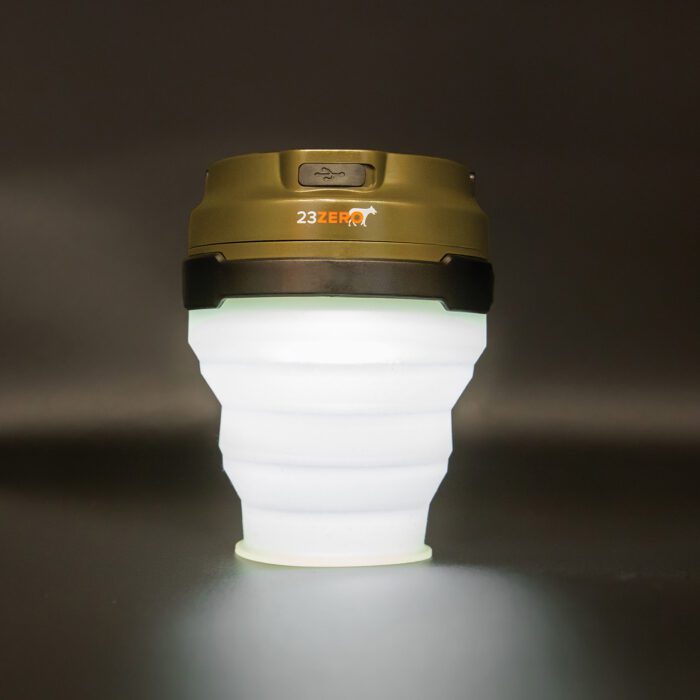

LED Solar Tent Light
From $25.00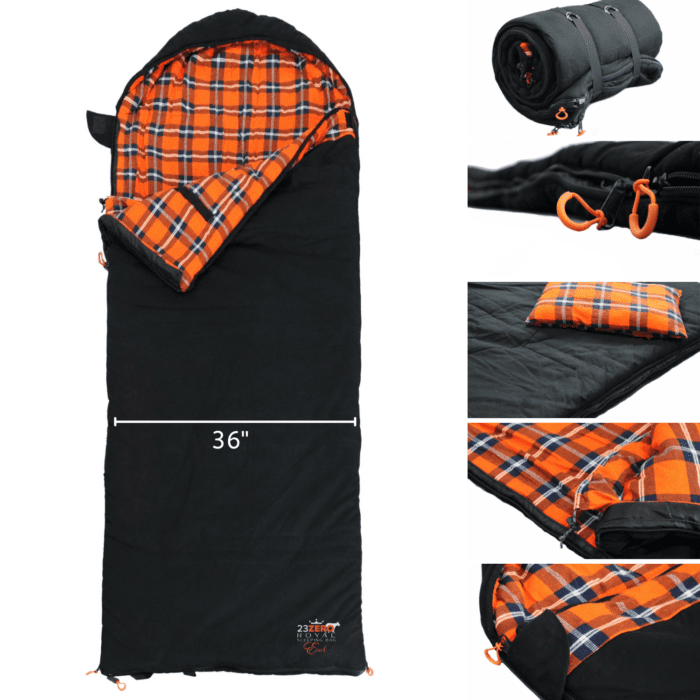
Royal Sleeping Bags
From $145.00

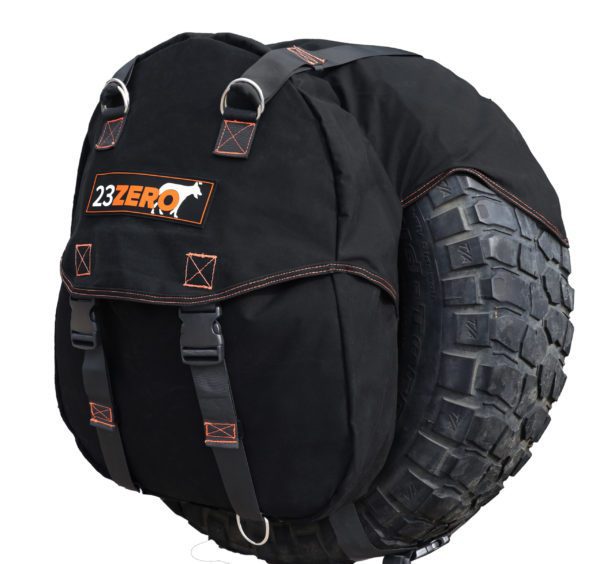
Dirty Gear Bag
$145.00


Best Gifts for Overlanders Under $750
This price range is where overlanding gifts really start to shine, offering upgrades that bring comfort, capability, and organization to any adventure setup. From the Peregrine PRO 180° Compact Awning that adds instant shade to any campsite with is compact size and compatible wall kit to the 132L Overland Gear Box With Wheels for serious storage, this tier is packed with high-impact gear. If you’re considering what might be the best gifts for overlanders, these practical campsite solutions like the Rear Trash Bag, the Outbreak 1550 Swag, and the Bandit Swag 900 for easy, all-in-one shelter are ideal. These gifts are thoughtful, durable, and perfect for the overlander ready to elevate their time outdoors.
Overlanding Must Haves Under $750


Bandit Swag 900
$395.00
Outbreak 1550 Swag
$555.00
Peregrine 180° Compact Awning Wall 2.0
$345.00


Best Gifts for Overlanders Above $750
When you really want to make an impression, this tier delivers the kind of upgrades that transform the entire overlanding experience. From premium shelters like the Armadillo Horizon 3 — crowned the Best Rooftop Tent of 2025 — to heavy-duty shade systems like the Peregrine Pro 5 Arm 270° Awning and peregrine PRO 6 Arm 270 Degree Awning Wall Kit, these gifts bring serious capability to camp. You’ll also find standout additions like the legendary Walkabout Soft Shell Rooftop Tent series, the sleek Armadillo AX3 Hard Shell Rooftop Tent, and the Peregrine PRO 180° Awning. Rugged, reliable, and built for years of exploration, these options define the preferred gifts for true overlanders ready to explore their next frontier and truly create a “gift of the year” moment.
Overlanding Must Haves Above $750


Peregrine PRO 180 Degree Overland Awning
From $895.00
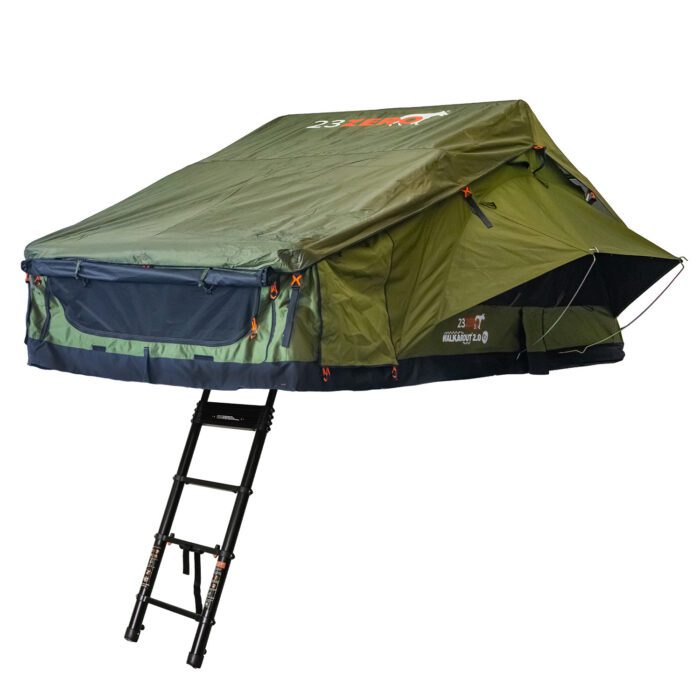
Walkabout 72 2.0 now with Heater & Cooler Port
From $2,695.00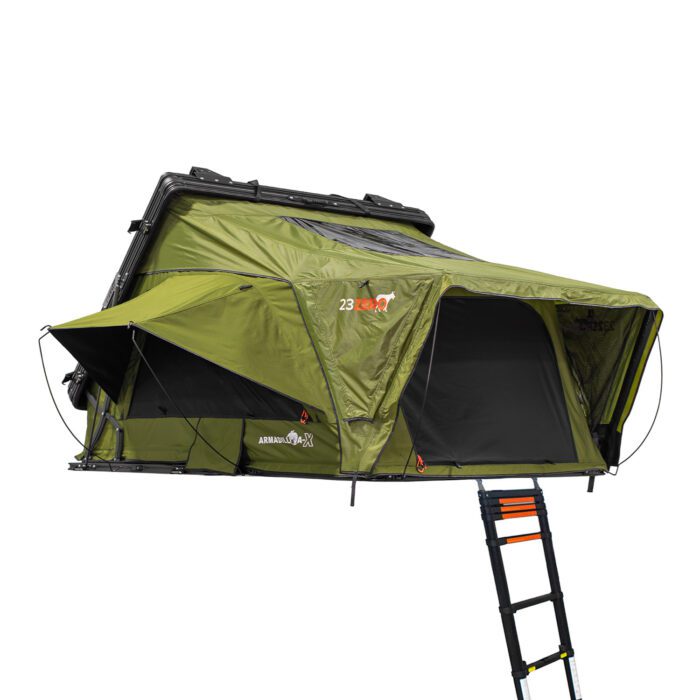
Armadillo AX3 – Aluminum Roof Tent for All Season Adventure
$4,295.00

Whether you’re gifting practical everyday essentials or going big with premium shelters and awning systems, these hand-picked items represent some of the best gear in the overlanding world. From stocking-friendly accessories to game-changing rooftop tents, each product in this guide was chosen to bring more comfort, capability, and joy to time spent outdoors. Indeed, these selections are among the best gifts overlanders can receive. We hope this helped spark ideas and made your holiday shopping a little easier. From all of us at 23Zero, here’s to cozy camp nights, memorable road trips, and the adventures waiting in the year ahead.
Looking for more inspiration on how to find the best gifts for overlanders? Check out The Adventure Portals Holiday Gift Guide – 2025 here.
Looking for our 23 Days of Christmas December Sale?
Our 23 Days of Christmas December Sale is EXTENDED now through 01/18, featuring some of the best pricing of the entire year on our most popular rooftop tents, awnings, and overlanding gear. Celebrate the holiday’s with up to 50% OFF sitewide.
If you’re shopping for yourself or seeking last-minute holiday gifts, this is the can’t-miss event of the season.
Happy Camping!
Enjoyed This Post?
Discover more tips, gear guides, product reviews, and overlanding insights from the 23ZERO team.
Explore the Blog →When it comes to bushcraft and outdoor survival, Dave Canterbury is a name that carries serious weight. As the founder of Pathfinder School and a globally recognized survival expert, his gear reviews and field tests go beyond opinion — they’re trusted evaluations rooted in decades of real-world experience. In this feature, he helps explain what a swag is and why this uniquely rugged canvas shelter has become a staple for serious overlanders.
So when Dave decided to take the Bandit 900 Swag into the field for a full overnight test, we knew his insights would be worth listening to. This wasn’t a studio review or a backyard demo — this was a real night out at the Pathfinder School, surrounded by students learning the fundamentals of outdoor wilderness survival.
Setting the Scene
It’s the final night of Pathfinder’s basic survival class. Students sleep in minimalist shelters they’ve built from scratch — no frills, no comfort, just the basics. Instructors, meanwhile, stay nearby to keep watch, rotating fire duty to ensure everyone stays safe through the night.
This time, Dave brought along something new: a Bandit 900 Swag, the same rugged, canvas-bodied shelter he discovered and picked up at Overland East. His mission was simple — see how the Bandit holds up in authentic conditions, and find out whether this Australian-inspired bedroll lives up to its reputation as the ultimate overlander’s shelter.
What Is a Swag?
If you’re new to overlanding or vehicle-based camping, you might be asking — what exactly is a swag?
A swag is a compact, all-in-one sleeping system that combines a tent, mattress, and shelter into a single roll. Originating in Australia, swags were historically used by bush workers and overland travelers who needed something quick, durable, and weatherproof — essentially a modern cowboy bedroll.
When rolled out, a swag forms a sturdy, weather-resistant mini-tent with built-in support hoops and ventilation flaps for airflow and comfort. Optional rain flies can be added to extend the covered space, creating a small awning-like area to shield gear or belongings from the elements. When it’s time to move, the swag rolls up neatly for easy strapping to a roof rack, trailer, or cargo bed. Unlike traditional nylon tents, swags are built from heavy-duty canvas, delivering superior insulation, breathability, and long-term durability.
In short:
- Easy to set up and take down
- Built for vehicle camping, not backpacking
- Exceptionally durable and comfortable
- Compact enough to store in your overland rig
The Bandit 900 takes this timeless design and elevates it with thoughtful modern refinements — a thicker foam mattress for comfort, improved airflow for all-season usability, and premium canvas engineered specifically for North American conditions. Like every 23Zero product, it’s built under our MADE BETTER principles — stronger materials, smarter design, and a relentless focus on lasting quality.


Setting Up the Bandit 900 Swag
Right off the bat, Dave notes that this is not your ultralight hiker’s tent — and that’s a good thing. At about 32–35 pounds, the Bandit 900 is built for vehicle-based camping and overlanding, not long-distance backpacking. Noting that it’s not meant to be carried. Think of it as a modern take on the old cowboy bedroll — roll it up, strap it to your rig, and you’re ready for the next leg of the journey.
“They roll these things up and put them on top of the vehicle to take them overland. It’s like the old chuck-wagon bedroll. You’re not carrying it on your back — you’re traveling with it.” — Dave Canterbury
Setup is intuitive and sturdy:
- Dome-style poles and snap-in clips make it familiar for anyone who’s ever pitched a tent.
- Two center spreader bars create the signature “swag” arch, giving it that roomy internal feel.
- The integrated canvas shell and heavy-duty steel stakes ensure the structure holds firm in wind and weather.
- Side vents unzip to create awnings for airflow and condensation control.
It’s the kind of design that trades a few extra pounds for lasting durability — and Dave immediately appreciates that balance.
Built for Comfort — and Built to Last
Once set up, Dave is immediately struck by the comfort and craftsmanship that 23Zero is known for.
“This thing has got an absolute ton of room in it. Got an awesome mattress… this is going to be a real comfortable night’s sleep without a doubt.”
The integrated high-density foam mattress makes all the difference, turning a rugged overlanding shelter into a legitimate bed. Inside, storage pockets for keys, knives, or phones keep small essentials off the floor and easy to find.
The canvas body is another highlight. Unlike synthetic nylon tents, canvas naturally breathes — meaning less condensation, even when temperatures dip into the 40s. Dave skips the optional rainfly that night, confident that the Bandit’s water-resistant canvas would handle the dew.
Swag vs Rooftop Tent — Which Is Right for You?
Many overlanders eventually face this question: should I go with a swag or a rooftop tent? Both are top-tier camping and overlanding solutions — but they serve slightly different needs.
| Key Feature | Swag | Rooftop Tent |
|---|---|---|
| Setup Time | Extremely quick (2–3 minutes) from roll-out to ready | Varies by style: hard shells can be up in 2–3 minutes, while soft shells take 8–10 minutes |
| Comfort | Thick built-in mattress, insulated canvas | Elevated sleeping platform, thinner mattress |
| Weight & Portability | Around 30–35 lbs, easily removable | Heavier (100–150+ lbs), semi-permanent mount |
| Use Case | Ground-based, perfect for quick stops or solo camping | Ideal for multi-day trips and group travel |
| Cost | More affordable | Higher investment, includes mounting hardware |
| Storage & Access | Stores compactly in rig or trailer | Always mounted, takes roof space |


In short — if you love simplicity, quick setups, and that “roll out and rest” mentality, a swag is the way to go. For those running full overland rigs who camp night after night in remote regions, a rooftop tent offers convenience and elevation.
Either way, 23Zero has you covered. See our full line of Swags or Rooftop Tents to make your compare and make your decision.
The Overnight Test
After checking on his students’ fires and assignments, Dave finally turns in around 12:30 a.m. The night is cool, quiet, and clear. By 6:15 a.m., the instructors are back up making rounds — and Dave wakes to realize he never stirred once.
“I can guarantee you I did not wake up in between. That’s how well I was sleeping.”
He calls it a “king’s sleep” — a telling review from a man who’s spent thousands of nights in the field.
Packing It Down
Morning comes quickly at Pathfinder School. While students review their notes and firecraft, Dave breaks down the Bandit 900. Packing it up is as easy as rolling it tight and strapping it down.
He stores his Wiggy’s sleeping bag and pillow in a 30-liter dry bag alongside the swag — still leaving room for extra clothes. Within minutes, he’s ready to move out.
That’s the real charm of a swag system: quick to deploy, quick to stow, and built to ride shotgun on any adventure.
Dave’s Takeaway
The final verdict? The Bandit 900 Swag isn’t for everyone — but it’s perfect for the right adventurer.
- It’s not meant for backpacking, but ideal for vehicle camping and overlanding.
- It’s built tough, with canvas that breathes, steel hardware that lasts, and a mattress that lets you truly rest.
- It’s spacious and simple, made for one person (plus a dog, if you’ve got one).
- It’s old-school reliable, fitting perfectly with Dave’s love of white-gas lanterns, cast-iron pans, and classic outdoor gear.
He plans to keep using the Bandit 900 at upcoming events and trail gatherings — a strong endorsement from someone who lives what he teaches.
Why It Matters
In a world where lightweight gear often sacrifices comfort and longevity, the Bandit 900 Swag stands as a reminder of what outdoor living used to be — durable, practical, and built for the long haul.
It’s the ideal setup for weekend explorers, overlanders, and anyone who prefers a bedroll they can throw in the back of a truck and trust completely.
“Not everything is about survival or backpacking. Sometimes, it’s about old-school car camping — just you, your vehicle, and the open world.” — Dave Canterbury
For those who share that same spirit of adventure, the Bandit 900 delivers.
Final Thoughts: Experience the 23Zero Bandit 900 Swag
Ready to elevate your vehicle-camping setup? Discover what a swag is and why outdoor expert Dave Canterbury trusts 23Zero gear to stay comfortable and prepared wherever the trail leads. Like what you see? Explore more of Dave’s survival videos and outdoor tips to help you thrive in the wild.
See our full line of Swags here
Watch the Full Video
Happy Camping!
Enjoyed This Post?
Discover more tips, gear guides, product reviews, and overlanding insights from the 23ZERO team.
Explore the Blog →